If your registrar is Onlinenic which uses DNS_DIY then your SOL because there is no instruction for you to follow... until now :D
So let start
1. Log in to your account at DNS-DIY
2. If it's not already selected, click Zone Edit.
3. Under Host enter only the subdomain you want to use. For example, if you picked
www.mydomain.com as your blog's address, just enter www as the entry under Host.4. Under Type select CNAME from the dropdown menu.
5. Enter
ghs.google.com under Data.6. Leave Priority and TTL as is.
7. Click APPEND

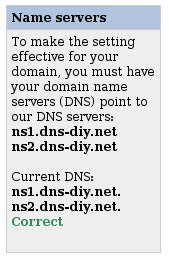
8. Next is to make sure the domain name server is pointing to DNS-DIY's DNS server. To do this click Loookup if its Correct then your done, you'll just have to wait for 24 to 48 hours for it to propagate. Now if it fails then we have to go to ONLINENIC to change the DNS Server.

9. Log in to your account at ONLINENIC
10. Type ns1.dns-diy.net for DNS1 and ns2.dns-diy.net DNS2

11. Click Modify
12. Follow no. 8 instructions to test if its working you can also do a NS Lookup. Google nslookup and click anyone of them ex. Kloth.net,
If it still doesn't work then contact your Domain hosting and ask for help.
**UPDATE**
Regarding SysOp's question about using Google's IP addresses. Yes, nowadays you should put the following IP address in your DNSDIY configuration.
216.239.32.21
216.239.34.21
216.239.36.21
216.239.38.21
To do this you must create an "A" Name/Type for each IP Address as shown in the example below.

No comments:
Post a Comment